OpenRCT2-FireworksPlugin
A plugin for OpenRCT2 to create and view fireworks shows.
Author:
 MaxMallon
Submitted:
about 1 hour agoUpdated:
about 1 hour agoStars:
0Tags:
License:
MITLinks:
GitHub Repository MaxMallon on GitHubOpenRCT2 Fireworks Plugin
A plugin for OpenRCT2 that allows you create and run your own firework shows, and easily share them with others.
The plugin provides an editor for creating your own fireworks and combining them into fully timed and schedulable shows which can even be synced up with a ride's music. Your fireworks data is saved in the park, including shows that are currently playing, so parks can be shared with other players who have the plugin installed. A park with fireworks actively playing during saving will have a news message inserted to inform possible future players opening the file without the plugin that this park includes fireworks, and where to get the plugin.
The plugin is currently single-player only. Multiplayer support is not technically feasible at this time.
Features
- Create aerial and ground-based fireworks for sequences and shows.
- Fifteen different base effects, all highly customizable
- Combine effects into larger fireworks with controls for shape, size, trajectory, and colour.
- Build reusable sequences, including sequences nested inside other sequences.
- Schedule shows by date or at repeating daily, weekly, monthly, or timed intervals.
- Synchronize a show with a ride's music.
- Save fireworks data in park files so it can travel with a park.
- Export and import fireworks data for reuse in other parks.
- Use the built-in tutorial and debugger while designing shows.
- Temporarily switch to the default colour palette when an unusual park palette makes the editor difficult to read.
 |
 |
 |
 |
Download
Plugin
Download the plugin from here: Fireworks_Plugin.js
Showcase Park
I made a little park to showcase some of the plugin's capabilities. Use it as inspiration!
Download the showcase park here: Fireworks_Showcase.park
Installation
- Make sure OpenRCT2 is up to date. The plugin requires the minimum OpenRCT2 version of 0.5.6 (which at the time of writing this isn't released yet, so the latest development version).
- Download the
Fireworks_Plugin.jsplugin file from the latest release. - Copy
Fireworks_Plugin.jsinto thepluginfolder in your OpenRCT2 user directory. - Start OpenRCT2 and open a scenario or saved park.
- Long-click the map icon to open the plugin list, then select Fireworks.
The first time you open the editor, the built-in tutorial will open automatically. It can also be opened later from the configuration tab.
Getting Started
The plugin has two modes: edit mode and play mode.
In edit mode, the Fireworks Editor is available. This is where you create launch sites, effects, sequences, and shows, test your work, and configure the plugin. A new park normally opens in edit mode, and the first time you open the editor the built-in tutorial opens automatically. You can open the tutorial again at any time from the configuration tab.
In play mode, the editor is replaced by the show-playing window. This window is intended for parks that already have a fireworks programme configured: it shows which shows are active and when scheduled shows will run, and provides the button to stop the programme.
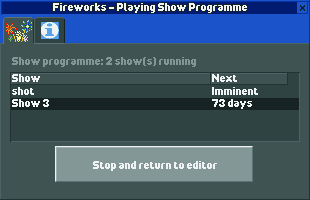
This distinction matters when opening somebody else's park. If the park was saved while a fireworks show programme was active, it will open in play mode and you will not see the editor. Stop the show programme from the show-playing window first; once the programme has stopped, the editor will be available again. Parks can still be opened safely by players who do not have the plugin, but the fireworks will not run for them.
When creating a show from scratch, work through the editor from left to right. The tabs follow the order in which you will usually build a show: define where fireworks launch, create the effects, combine them into shells and ground effects, arrange those items in sequences, and finally schedule the sequences as shows.
Launch Sites
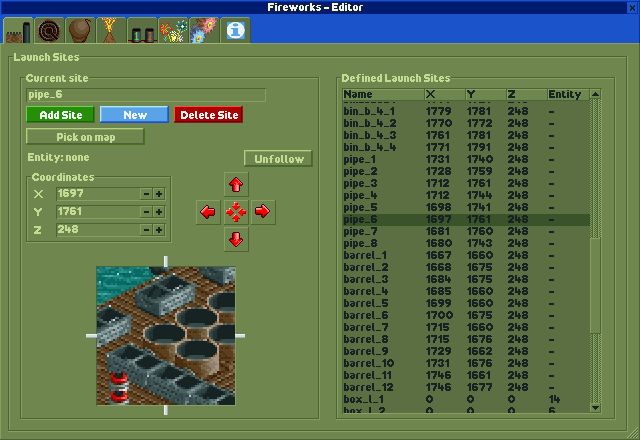
Before creating fireworks, define at least one launch site. Launch sites are the locations from which fireworks are fired, similar to the cardboard boxes with tubes used for real-world fireworks. Give each site a descriptive name so it is easy to find later instead of relying on names such as Site 1 and Site 2.
Use Pick On Map to choose a location or attach the site to an entity such as a ride vehicle. If no entity is selected, the launch site is placed at the middle of the chosen tile at the land surface height. The coordinate controls and arrow buttons can then be used to fine-tune its position.
When a site follows an entity, its coordinates can be relative to that entity, such as a position 20 units above it. Use the unfollow control to detach a site if you selected the wrong entity or no longer want it to move with one.
Loads
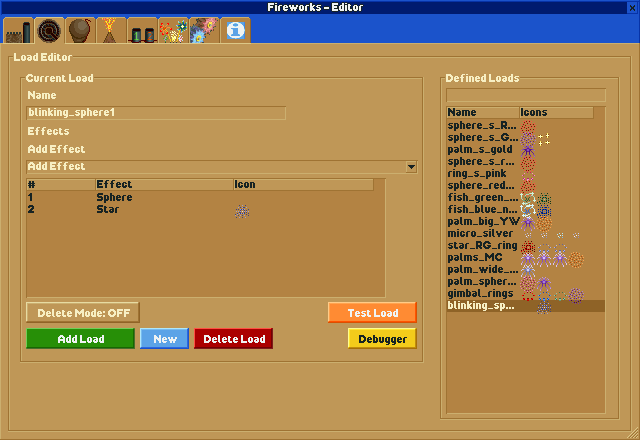
A load is a collection of effects that are fired together inside a shell. Loads are usually the main building blocks of the spectacle: each effect contributes its own shape, size, and colour settings, and several effects can be combined to make a more complex burst.
Add effects with the effect selector, then configure them in the effect window that opens. The ? button in an effect window explains the settings for that effect. Give loads descriptive names, use Test Load to preview them, and remove unwanted effects with delete mode.
Keep an eye on the particle budget while building loads. Large loads with many effects can reach OpenRCT2's particle limit quickly; the debugger is available while testing to help you measure this.
Shells
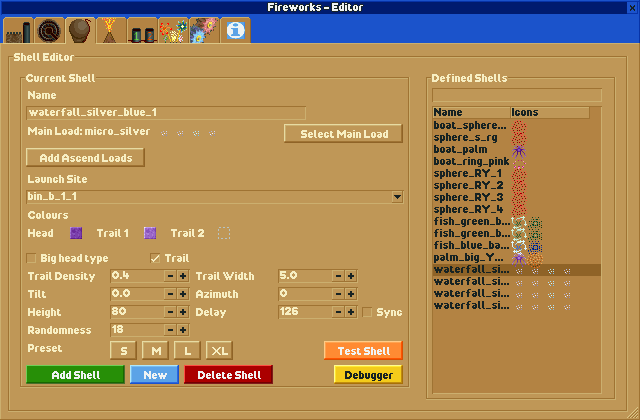
A shell launches a load from a launch site. Every shell needs a main load and a launch site. A shell can also have optional ascend loads that trigger while it is rising; these are most useful for larger shells or high-altitude effects.
Shell settings include:
- Trail colour, thickness, and density.
- Shell colour and head type.
- Tilt and azimuth for angled launches.
- Launch height and delay before the main load is triggered.
- Random variation for the launch trajectory.
Tilt is the angle away from straight up, while azimuth controls the direction around the map. Height controls how long the shell takes to reach its highest point, and delay controls how long it waits before triggering the main load. These values are normally kept synchronized, but they can be separated when a particular effect needs different launch and burst timing. The preset launch buttons provide a quick starting point and do not change the shell's loads.
Ground Effects
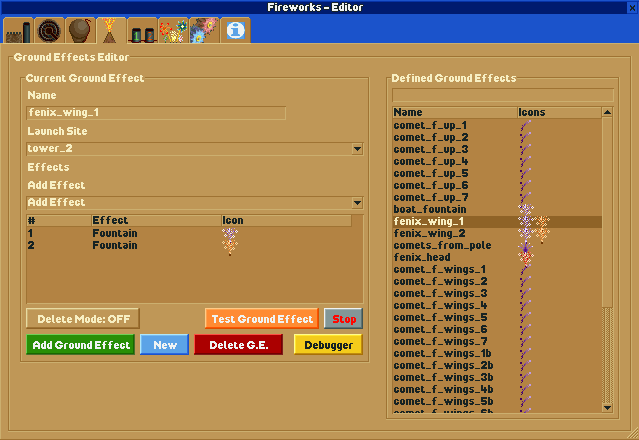
Ground effects are fired directly from a launch site rather than into the sky. They are useful for supporting a show with effects at ground level, and are configured in much the same way as loads and shells: create a named item, add effects, test it, and remove unwanted effects when needed.
The available ground effects differ from the effects used in loads because they are designed for ground-level use. Some emit continuously for a period of time instead of ending after one burst.
Sequences
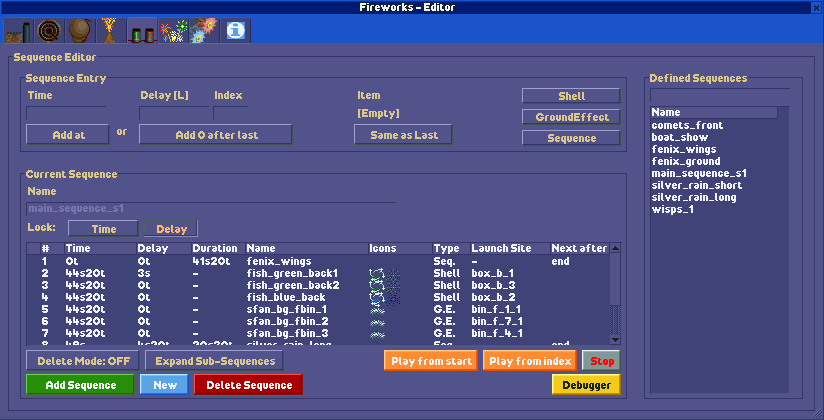
A sequence is a timed list of shells and ground effects. Start by adding an item, then add later items either at an absolute time or after another item with a specified delay. Time values accept combinations such as 2m30s20t, where t is a game tick. For example, 60t equels 1.5 seconds and 1m is one minute.
Sequences can contain other sequences, which makes it possible to build and reuse sections of a show. A sequence cannot contain itself. When adding an item, the index controls which existing item it follows; leaving the index empty adds it after the last item.
The time and delay locks control how existing items move when something is inserted. Locking Delay preserves the delay after an item and shifts later items forward when necessary. Locking Time preserves the absolute time and updates the affected delay instead. This makes it possible either to insert an item and move the rest of a section, or to insert one into an existing time slot without shifting the rest of the show.
Because a sequence has a duration, an item added after a nested sequence can be placed after the start or after the end of that nested sequence. Use the expanded view to inspect the complete sequence tree when needed, although editing is usually clearer in the collapsed view.
Shows
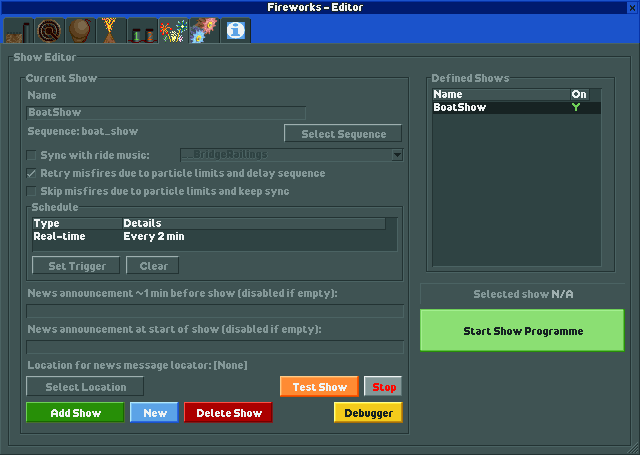
A show is a scheduled sequence. Select the sequence to play and choose when it should run, including specific dates or repeating schedules such as daily, weekly, monthly, or every few minutes. Shows can display customizable news messages before and when they begin; leave a message blank to skip it.
Shows can also be synchronized with a ride's music. Select an operating ride and its music will start from the beginning when the show starts, provided the ride is open and not broken down. When particle limits would otherwise interrupt synchronization, a show can skip failed effects instead of delaying them. This avoids shifting the fireworks out of sync, but designing the show to stay below the particle limit is still preferable. Use Test Show Now to test the music synchronization.
Enable the shows you want to run in the list, then start the show programme. The show-playing window displays the active schedule and provides the button to stop the programme and return to the editor.
Configuration
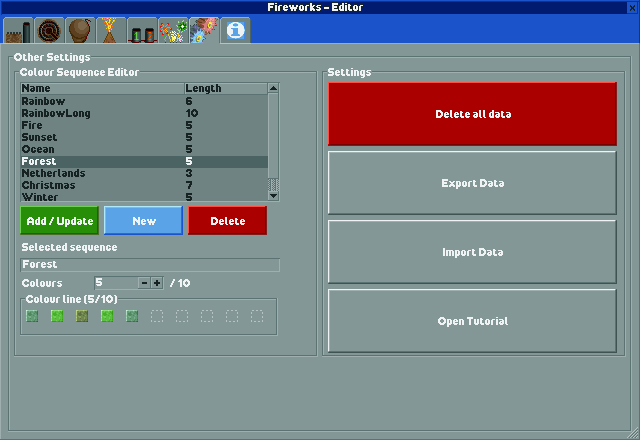
The configuration tab contains tools and settings that apply to the editor as a whole. It is also where you can create and manage colour sequences. A colour sequence is an ordered list of colours that can be reused by effects that support them, such as spray bursts. The plugin includes several colour sequences by default, but you can create your own, rename them, change the colours from left to right, adjust the number of colours, or remove sequences you no longer need.
Use the import and export controls to move your fireworks data between parks. This is useful for reusing effects, loads, shells, sequences, shows, and colour sequences. Launch sites are tied to the map and do not transfer meaningfully between parks, so imported launch sites may appear underground or in the air and should be repositioned.
The configuration tab also has the Tutorial button. It opens the in-game tutorial again whenever you need a reminder about a tab or workflow, even after the tutorial's automatic first opening.
Debugger and Particle Limits
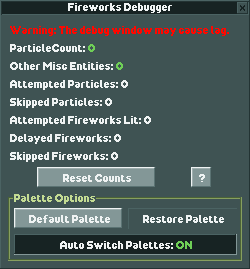
OpenRCT2 has a hard limit of 3,200 miscellaneous entities at one time. This pool is shared by the crashed-vehicle particles which form the fireworks and other effects, including balloons, litter, money effects, ducks, explosions, steam-train smoke, and water splashes.
The debugger helps keep a show within that limit. It records the number of particles attempted, successful spawns, failed spawns, and affected fireworks. Testing a firework or sequence resets the debugger and begins a new measurement. A failed shell launch is also counted as delayed or skipped according to the show's settings.
For the best results, keep loads reasonably small and account for other particle effects already active in the park. Untracked particles using the invisible colour are not spawned, which can help conserve the particle budget.
Colour Palette Mode
Some custom park palettes make the editor difficult or impossible to read. The plugin can temporarily switch the park to the default palette while the editor is open, while remembering the park's original palette.
Palette mode can be controlled manually from the configuration tab. In automatic mode, the default palette is enabled when the editor opens and restored when you test a firework or close the editor.
FAQ
I cannot see any effects. What is wrong?
You may be zoomed too far out. Particles are visible only on the lower three zoom levels.
Why are parts of my effects missing?
The park may have reached the 3,200-particle limit. Fireworks share this limit with litter, balloons, and other miscellaneous entities.
I clicked Test, but I cannot see my load.
The editor window may be blocking the view. Move it and test again.
How can I delay the rest of a sequence when the times are not editable?
Set the sequence lock to Delay, add a new item with a large delay immediately before the section you want to move, then set the lock back to Time and delete the temporary item. The rest of the sequence remains shifted forward. To undo the change, reverse those steps.
How can I easily copy an item to adjust the copy?
Simply click on the item you want to copy to load it into the editor, adjust the name and click Add [item], it will add the copy with the new name.
How come some of the fireworks look a little crooked?
The crashed vehicle particles were never meant for fireworks and use wonky integer math from the 90s. That causes them to not behave symetrically. This was not noticable with a few particles scattering about as a coaster train crashes, but becomes easily apparent when you have a perfectly symetrical sphere of them.
(Sort of) Planned Features
- Additional firework effects.
- Sound effects.
- A non-sandbox mode with costs, ride integration, excitement bonuses, and guests gathering to watch.
- More suitable particles.
- Maybe one day multiplayer support.
Special Thanks
- Basssiiie: For FlexUI and helping me often along the way
- Manticore_007: For helping along the way and beta-testing
- In_Error_Predicting_A_Fault: For the banner artwork and beta-testing
- Timmy_Tuner: For beta-testing
Building the Plugin as developer
Prerequisites
- The latest LTS version of Node.js, including npm.
- A local copy of this repository.
Setup
-
Open a terminal in the repository root.
-
Install dependencies:
npm install -
Build the plugin in development mode:
npm run build:dev
The development build is readable and is written directly to the OpenRCT2 plugin folder as Fireworks_Plugin.js.
Build Commands
npm run build:dev builds a readable development version in the OpenRCT2 plugin folder.
npm run build creates an optimized release build in dist/. The release build is minified with Terser and is intended for sharing.
npm start watches the src/ directory and runs the development build whenever a TypeScript or JavaScript file changes.
Accessing Game Logs
Game logs are useful when the plugin does not load or when you need to inspect output from console.log.
Windows
Open the openrct2.com file in the OpenRCT2 installation directory. If file extensions are hidden, enable them in Windows first.
macOS
Open a terminal, navigate to the OpenRCT2 installation directory, and run:
open OpenRCT2.app/Contents/MacOS/OpenRCT2OpenRCT2 Directories
OpenRCT2 Installation Directory
This is where the game itself is installed.
- Windows: commonly
%LocalAppData%/OpenRCT2/bin/when using the launcher, orC:/Program Files/OpenRCT2/when using an installer. - macOS: the folder containing
OpenRCT2.app. - Linux: distribution-dependent, commonly
/usr/share/openrct2or a mounted AppImage location.
OpenRCT2 User Directory
This is where OpenRCT2 stores user data such as saved parks and plugins.
- Windows: commonly
Documents/OpenRCT2/orC:/Users/<YOUR NAME>/Documents/OpenRCT2/. - macOS:
/Users/<YOUR NAME>/Library/Application Support/OpenRCT2/. - Linux: commonly
/home/<YOUR NAME>/.config,$HOME/.config, or the directory specified byXDG_CONFIG_HOME.
The user directory can also be opened from OpenRCT2 by selecting Open custom content folder in the menu under the red toolbox on the main screen.
License
This project is licensed under the MIT License.